

I grew up on a hobby farm. At any given period we had horses, dogs, cats, goats, sheep, chickens, ducks and sometimes deer and raccoons.

I love animals. All of them. But I currently live in Milwaukee, and the only animal I have, my horse, lives at my parents’ house. I have no pets living with me!!!
Well…until last week!!
In an urban setting, it can be really hard to compost unused organic material, especially during the winter. Compost often requires a super disgusting container, that is kept on the counter and disposed of often. In a country setting or an area with some acreage, a composting bin or barrel is a nice option. Although, it needs to be turned regularly, and it has the ability to release a pretty rank odor!
Discolored banana peels and apple cores are not my first choice of counter decoration, and our tiny yard does not have space for a composting barrel, AND it is about to be winter in Wisconsin, so I don’t want to be hauling compost outside everyday! Therefore, my husband and I are trying “vermicompost”, or a composting method that utilizes worms to transform natural waste material into a high quality, nutrient dense soil enhancer.
So we made a worm home (vermicompost) in our kitchen, so we can avoid throwing tons of trash into landfills, compost throughout winter, and create high quality worm castings and excretions to use around our garden, trees, and flowers.
Here is what we did…it took us less than 30 minutes (and all I did was take pictures and play in the dirt, looking for worms ;))
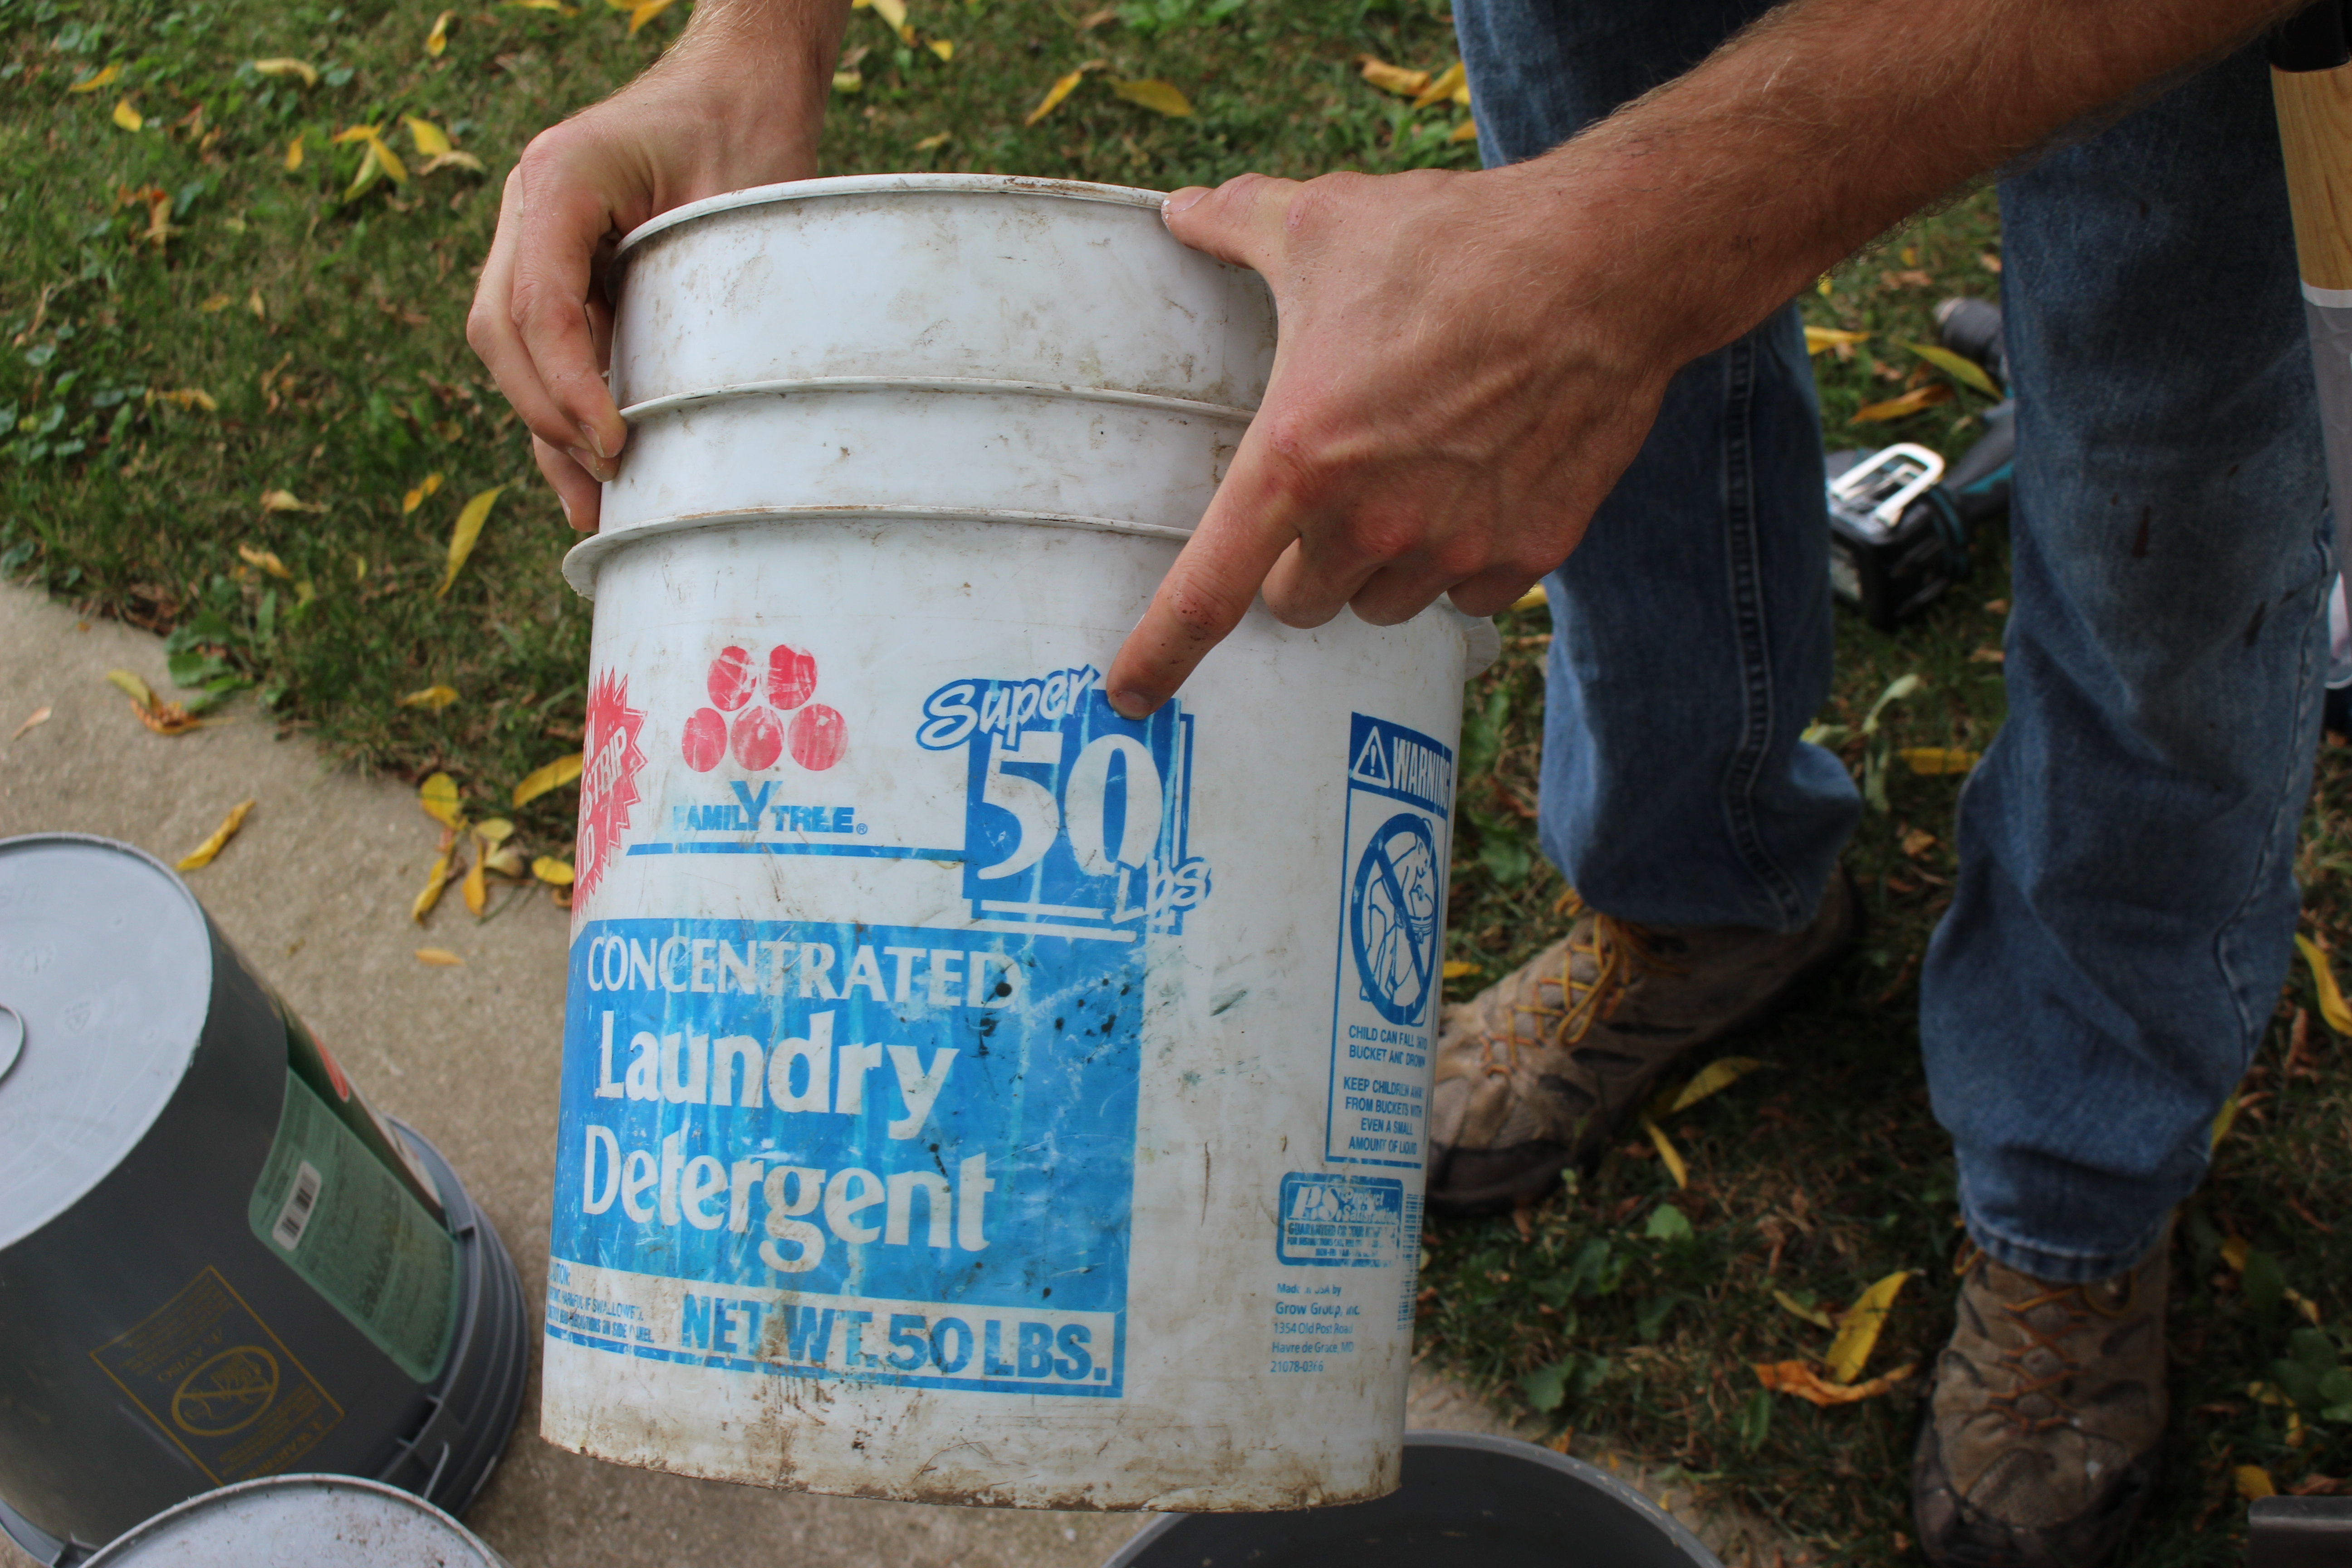
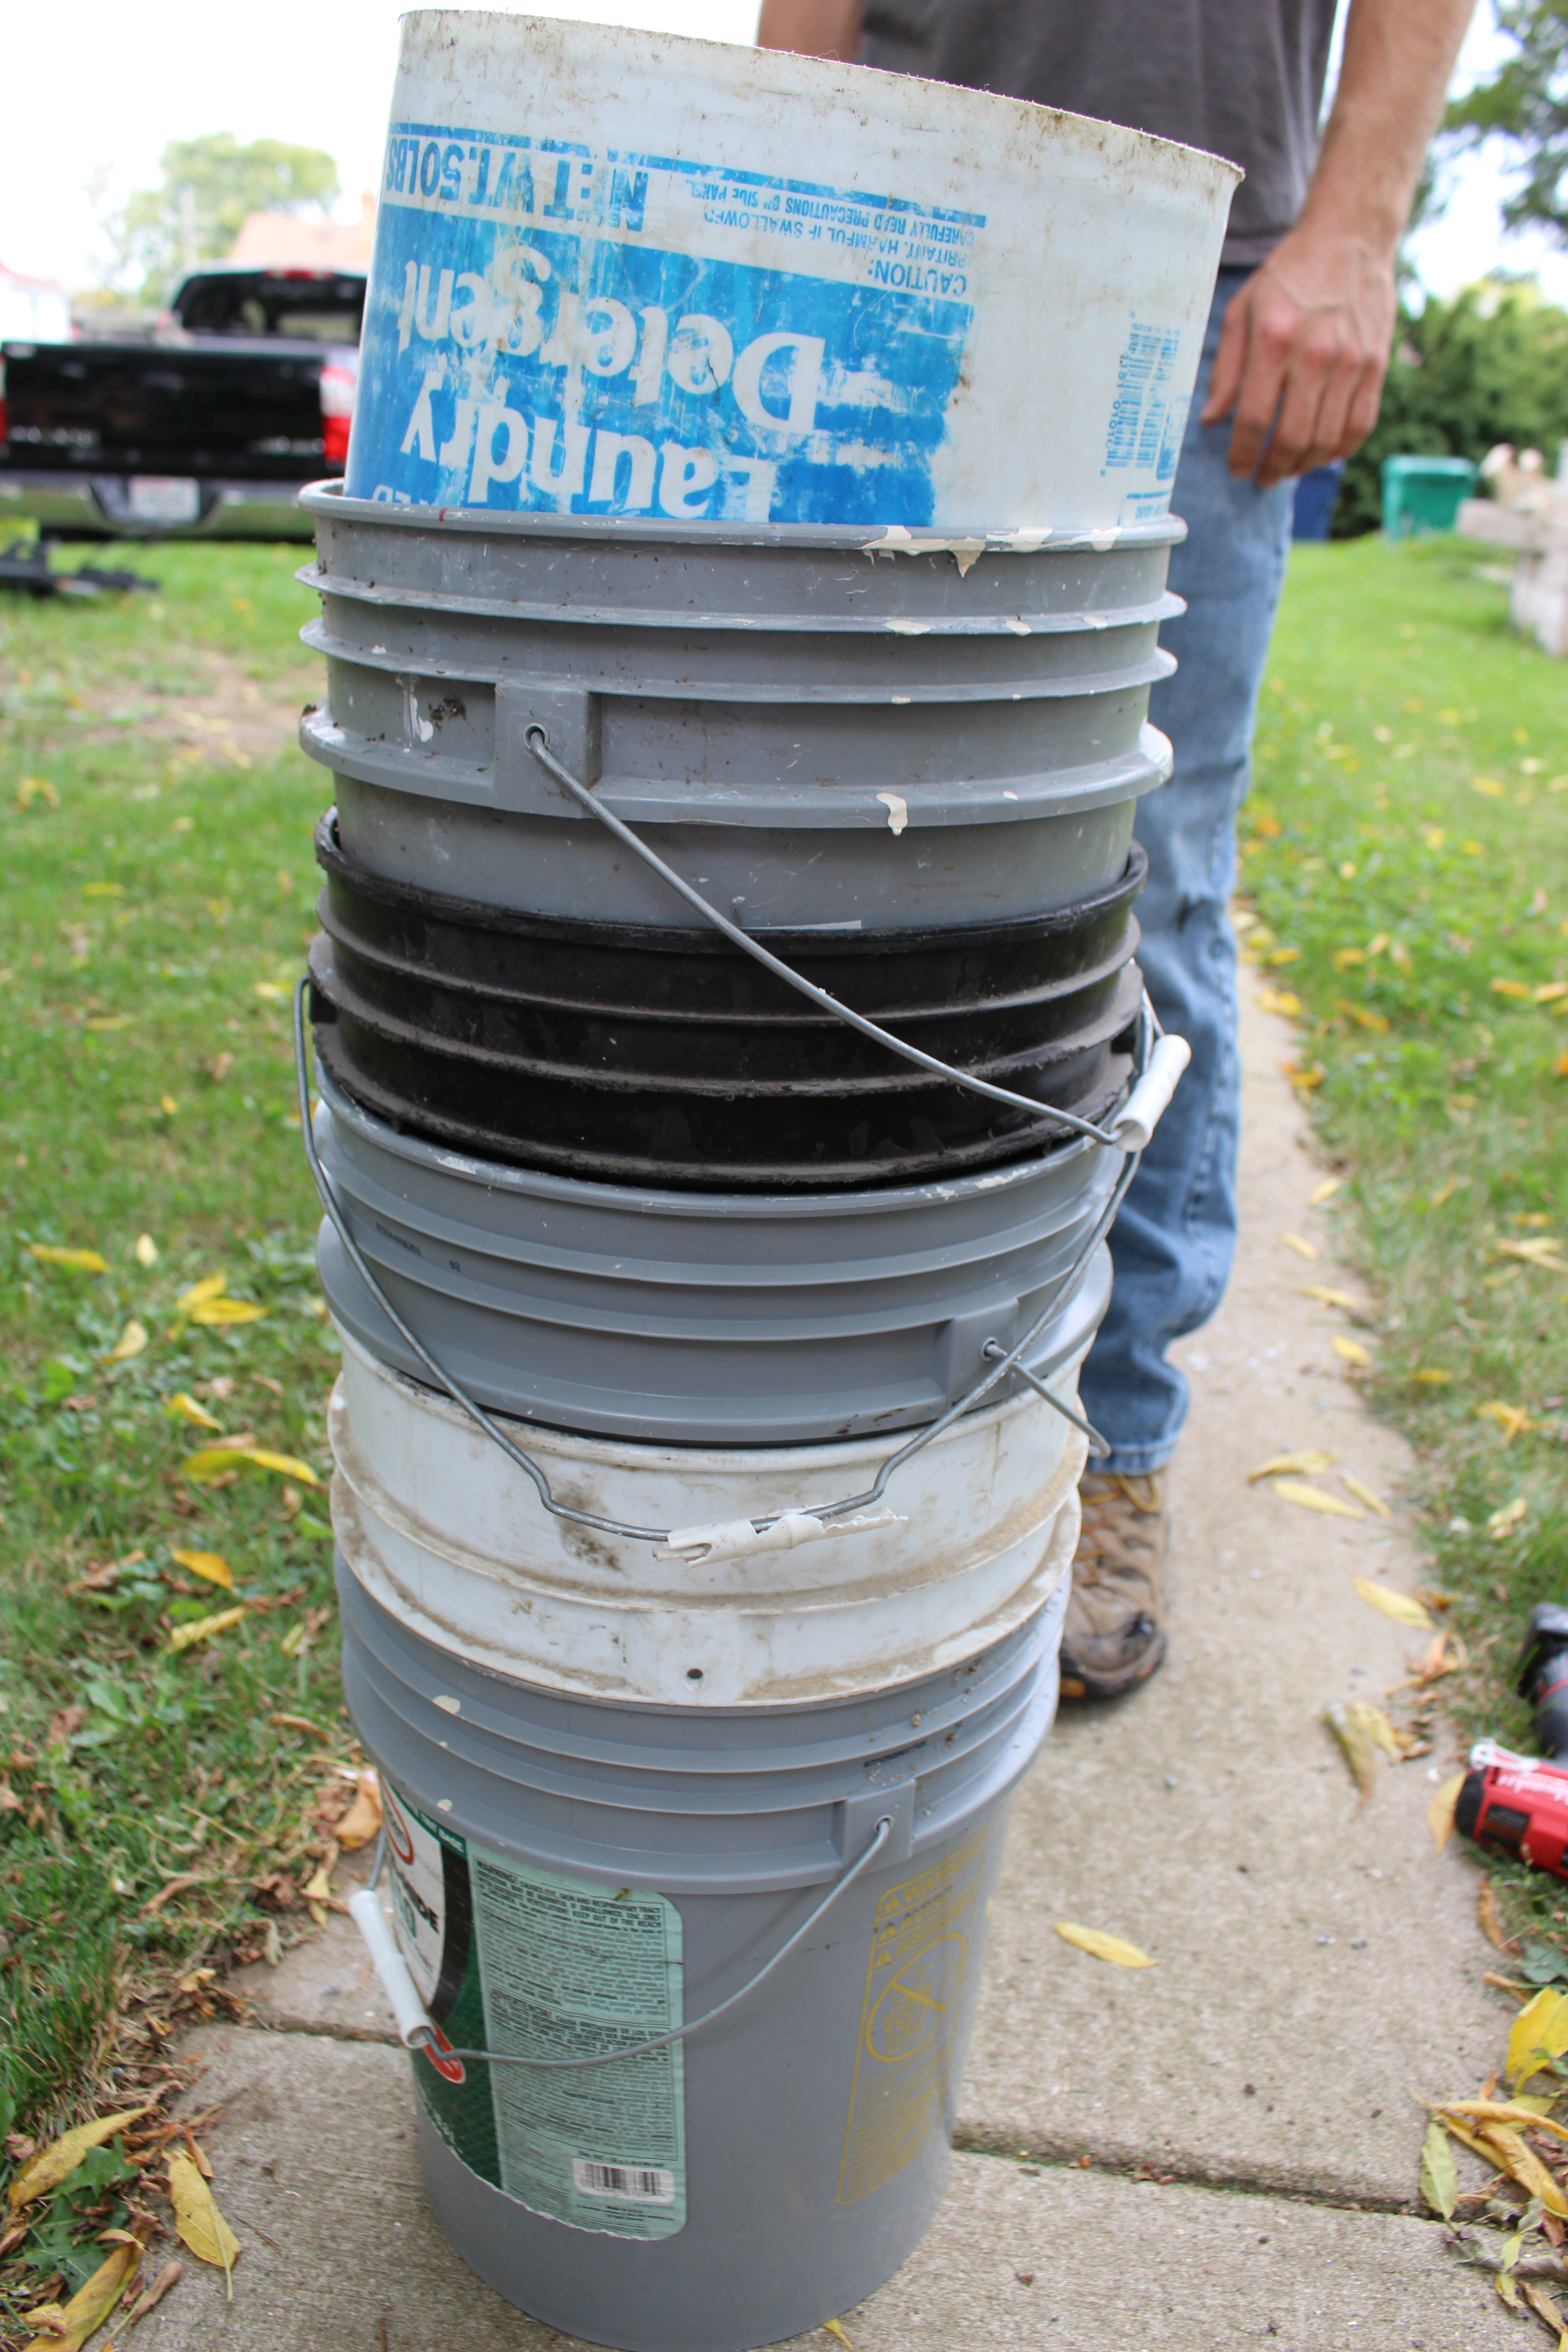
Step 1: Gather 5 five gallon buckets. Clean them. These will house your worms and live in some part of your home.

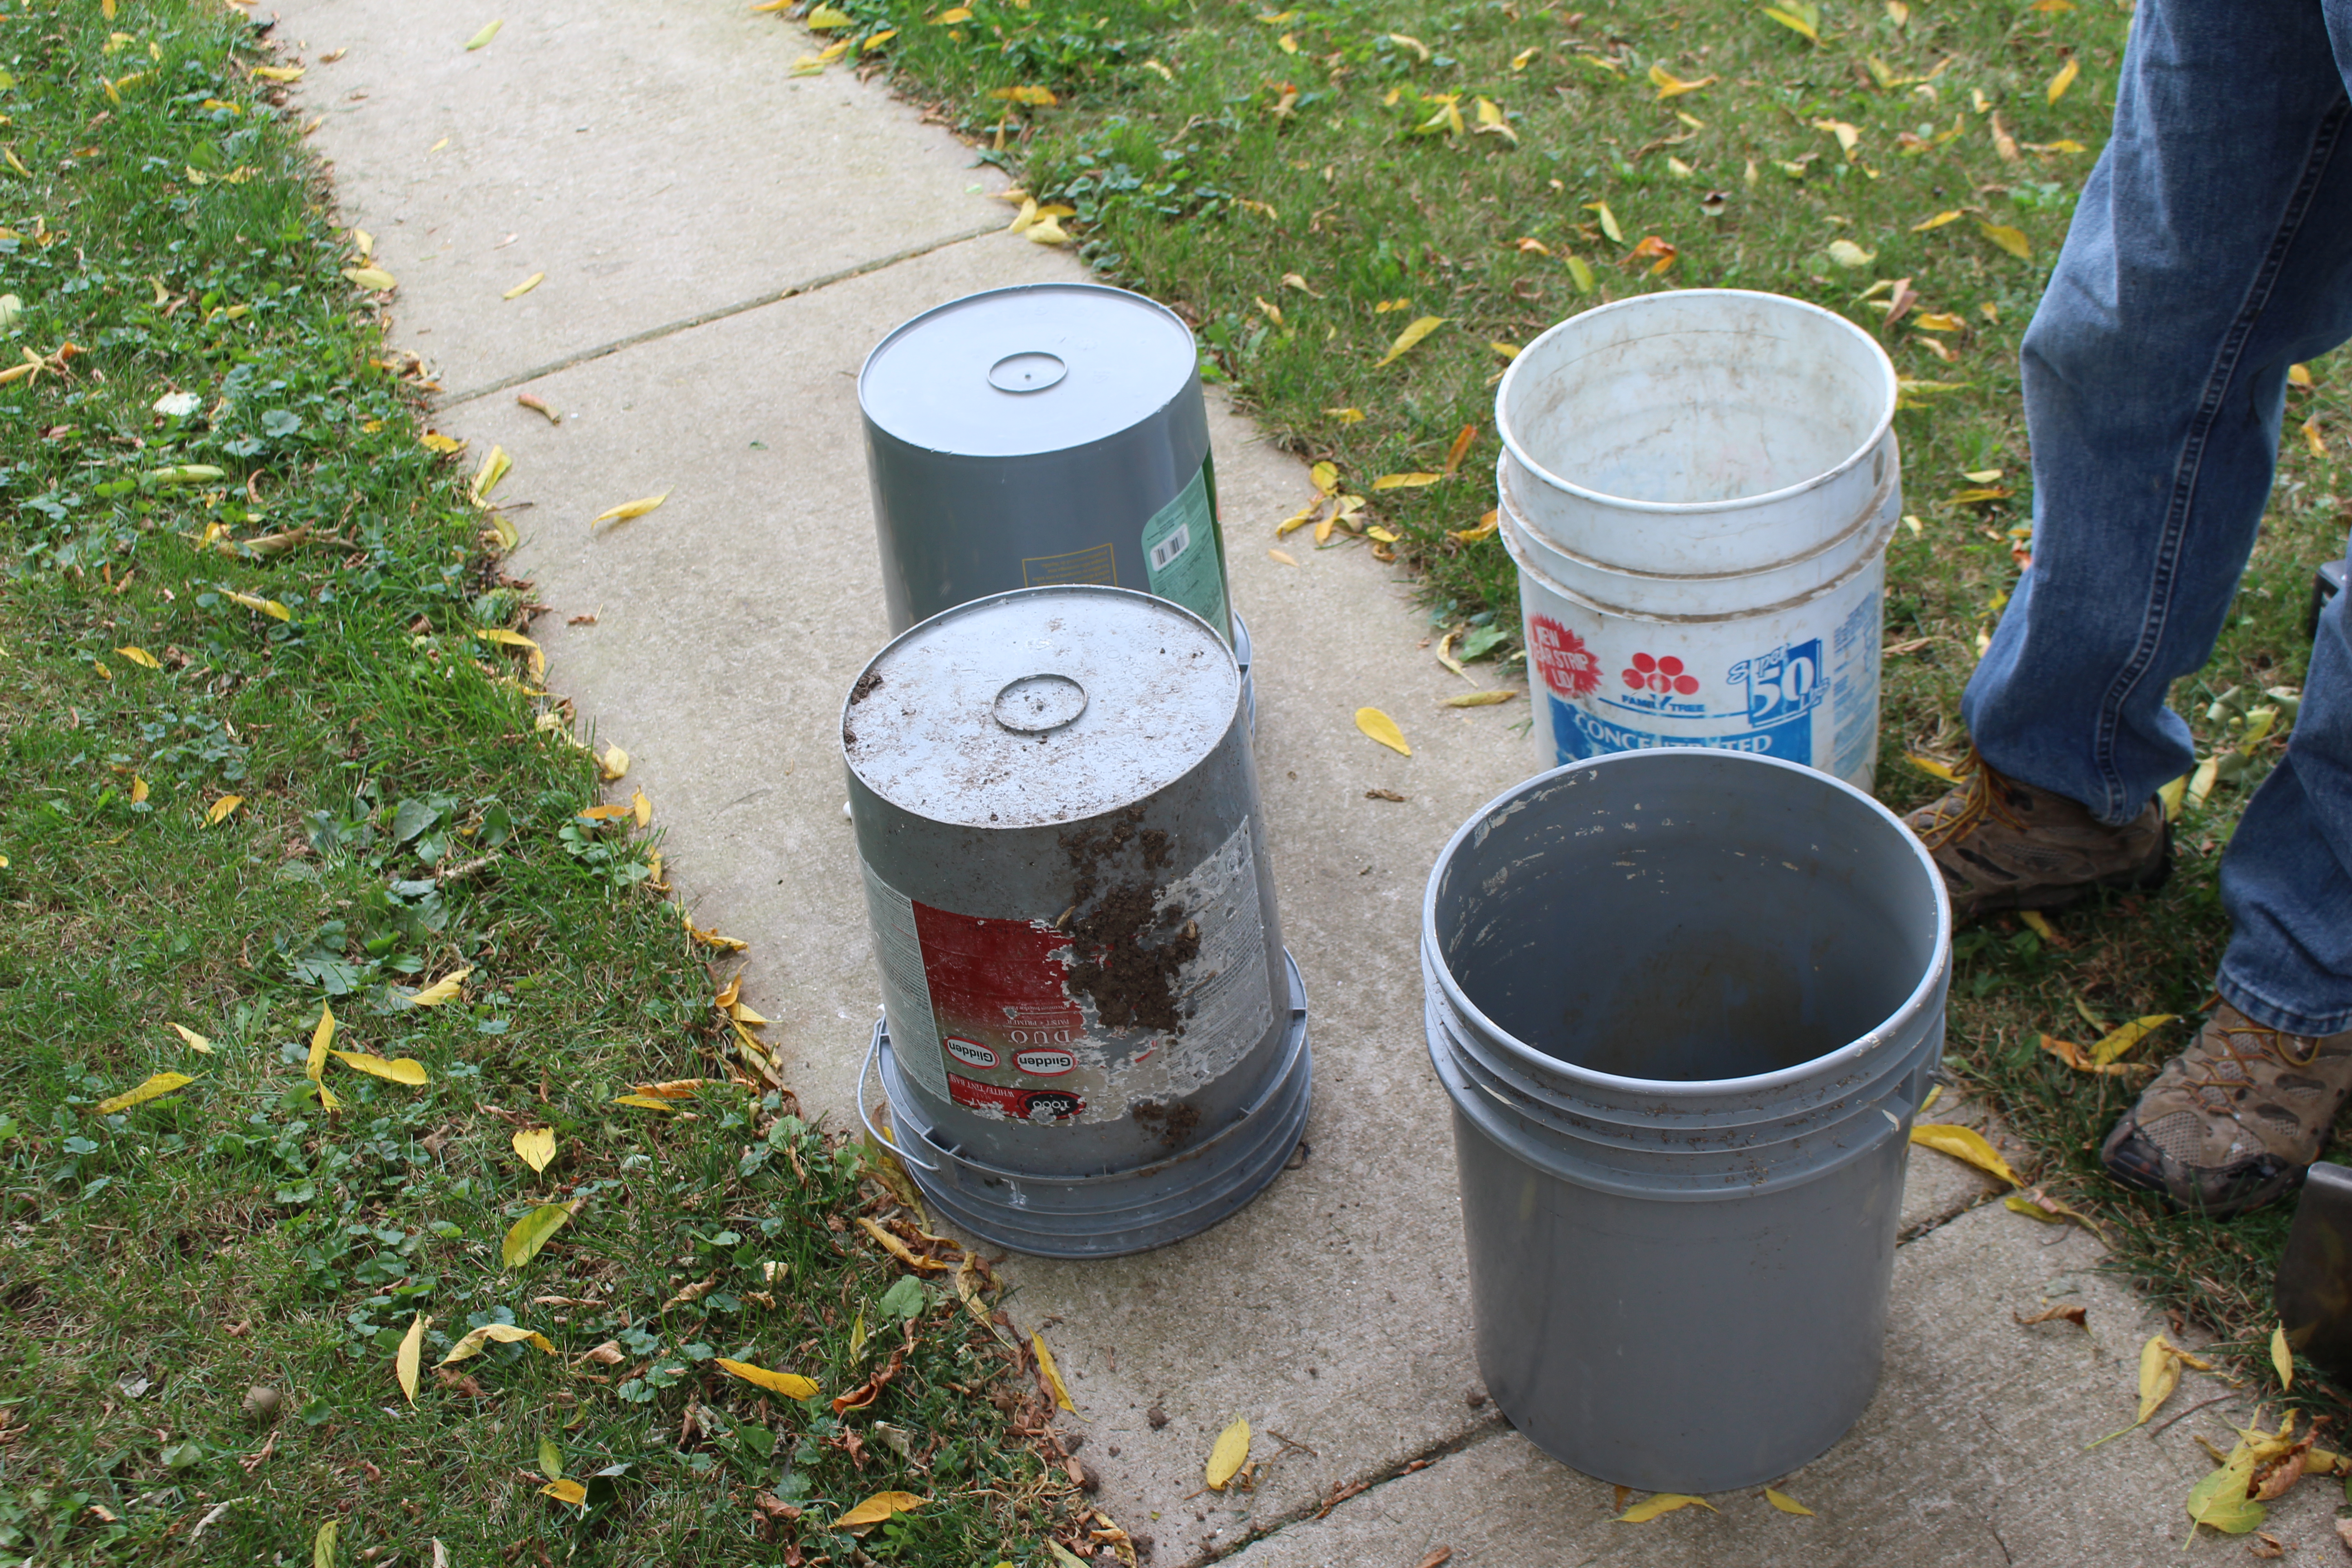
Step 2a: Put one bucket at the bottom. We don’t do anything to this bucket. It is the bucket that is going to catch the liquid remnants and slop. 🙂

Step 2b (not mandatory): Take the first bucket and put a spout on the bottom. (this will be for draining out the liquid slop, or the water excretions from the food scraps and worms. A spout is preferable, but if you don’t have one, you can just dump the bottom bucket, and wash it when needed.)

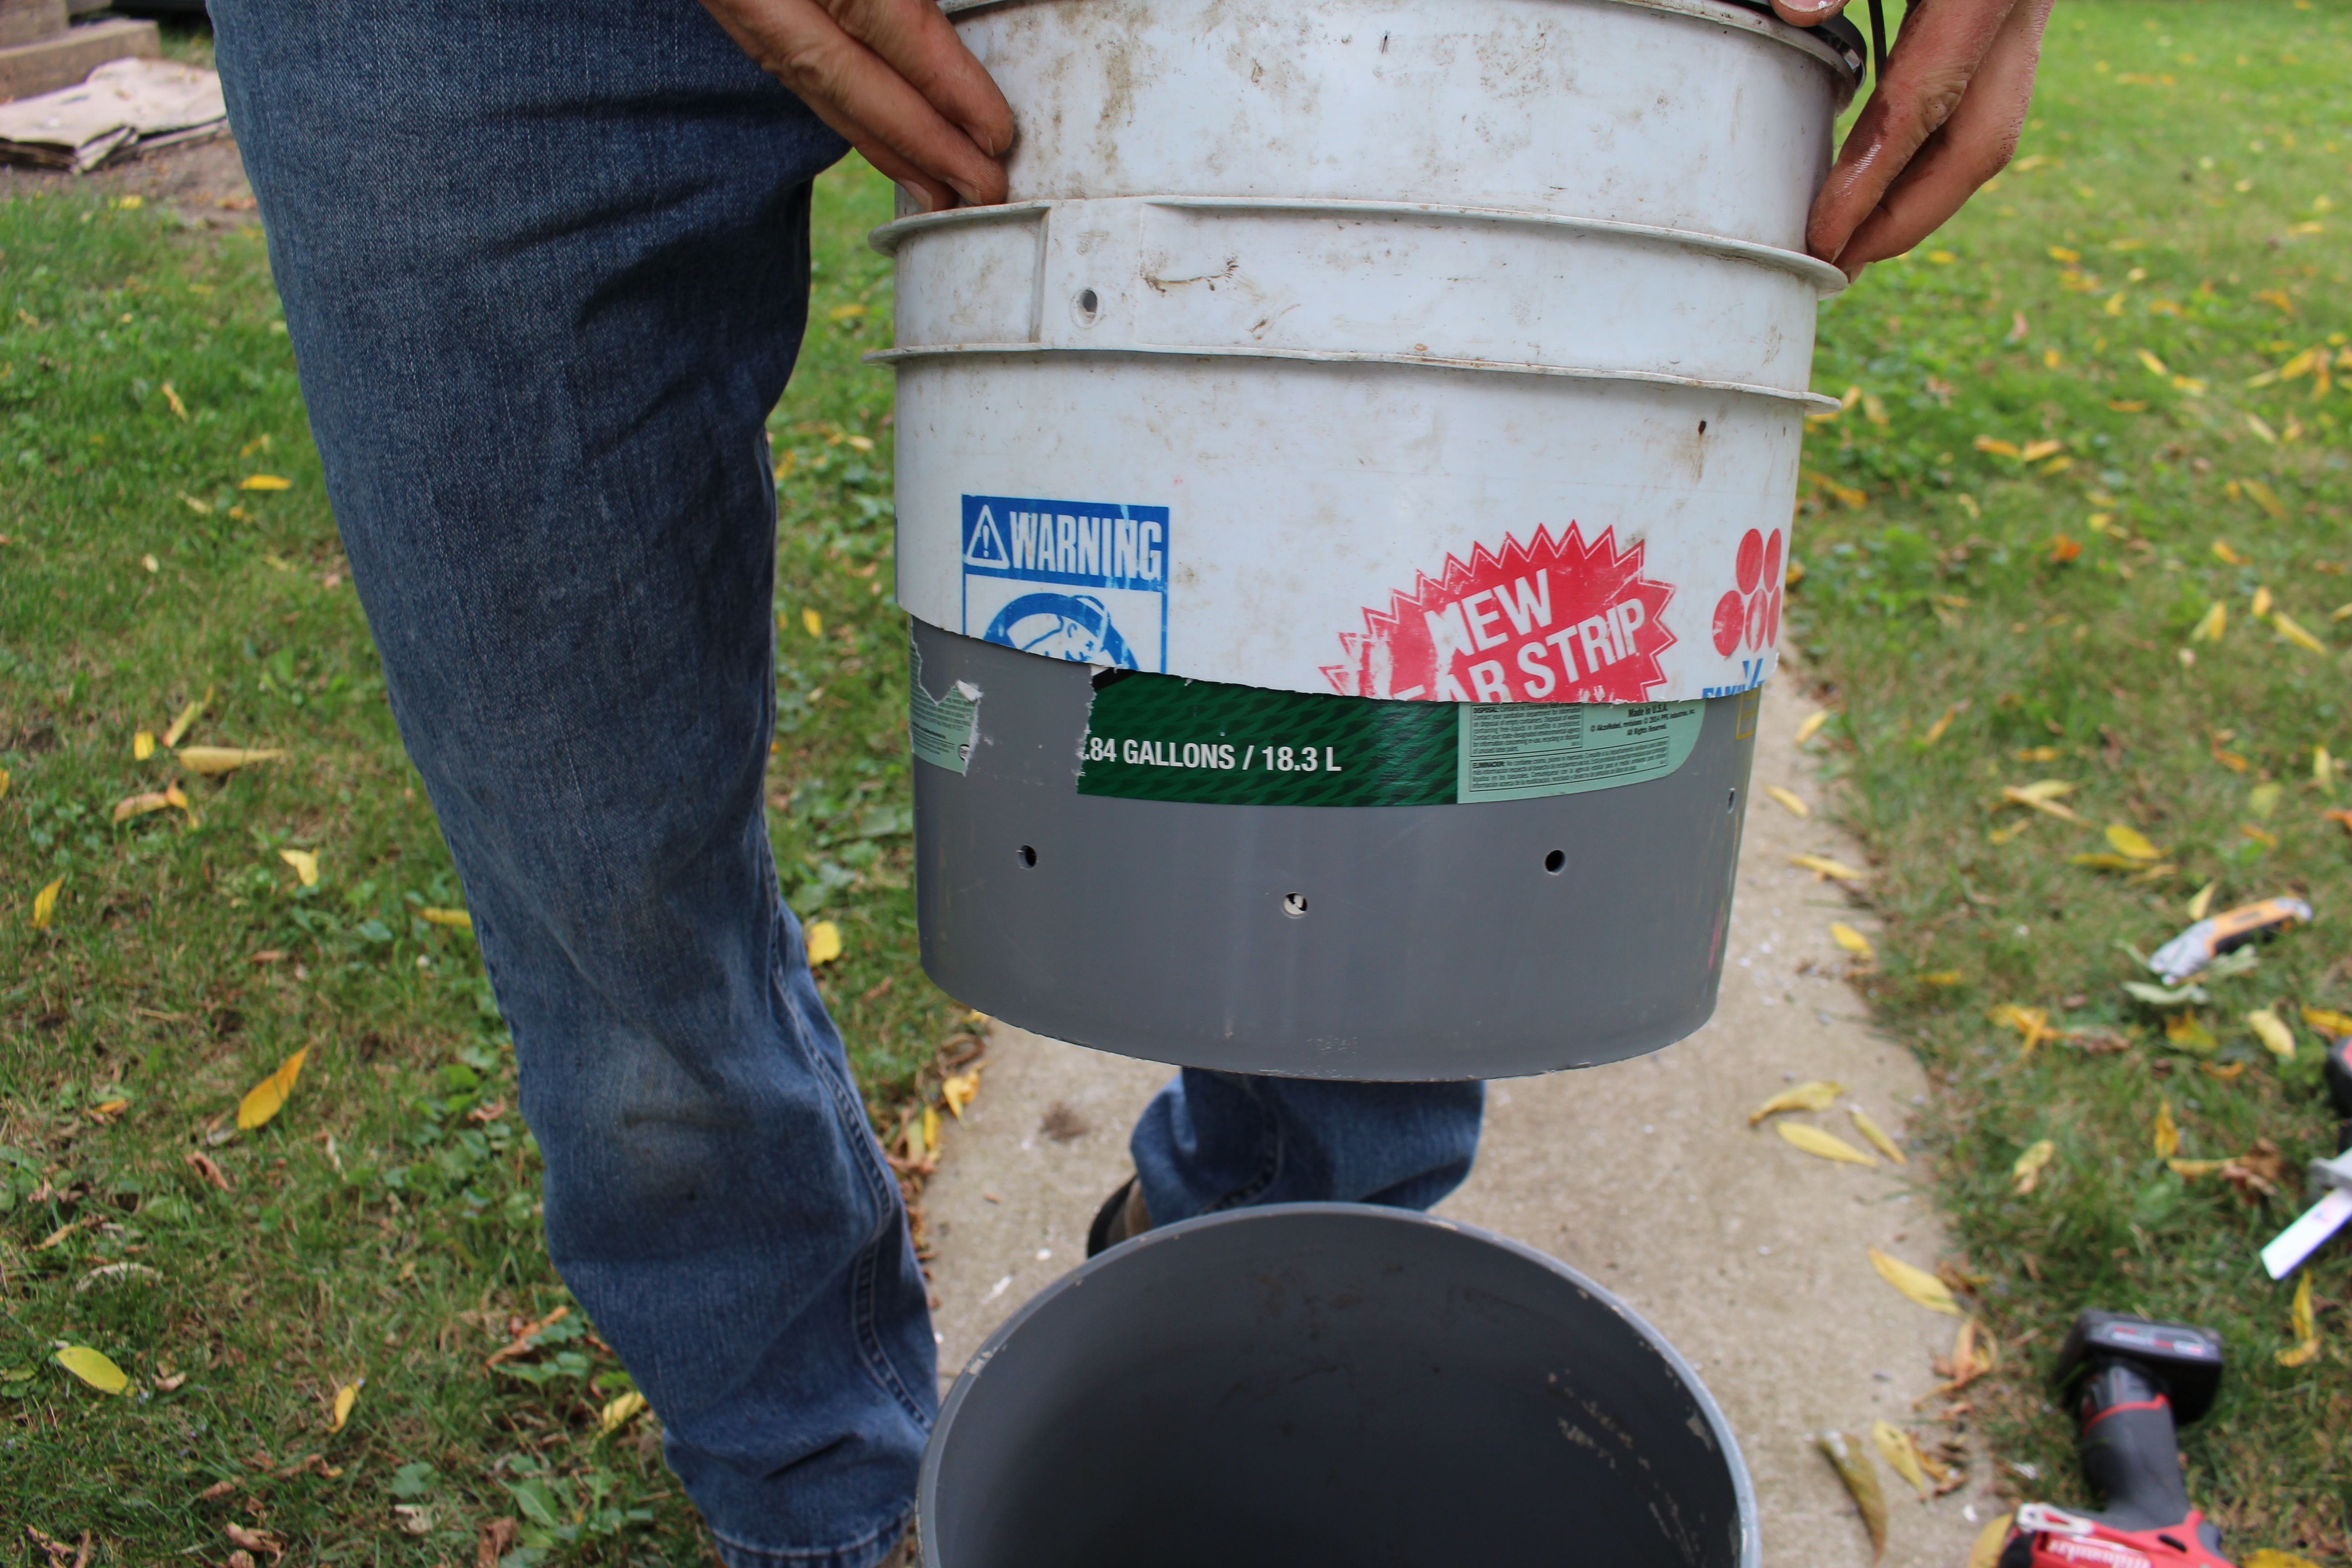
Step 3: Take a second bucket and cut off the bottom half. This bucket will act as a spacer between the first and third buckets. This will allow for some airflow and make sure that one bucket does not sit entirely in the other.


Step 4: Take a third bucket and drill holes all throughout the bottom of the bucket. (It should look sporadic and a little like swiss cheese.) Also drill some holes up along the sides to allow for more air flow. This is where the worms will live and create nutrient dense castings and excretions!


Step 5: Take a fourth bucket and create another spacer by cutting off the bottom half of the bucket.
Step 6: Take fifth bucket and repeat step 4 by drilling holes in the bottom and sides of the bucket.
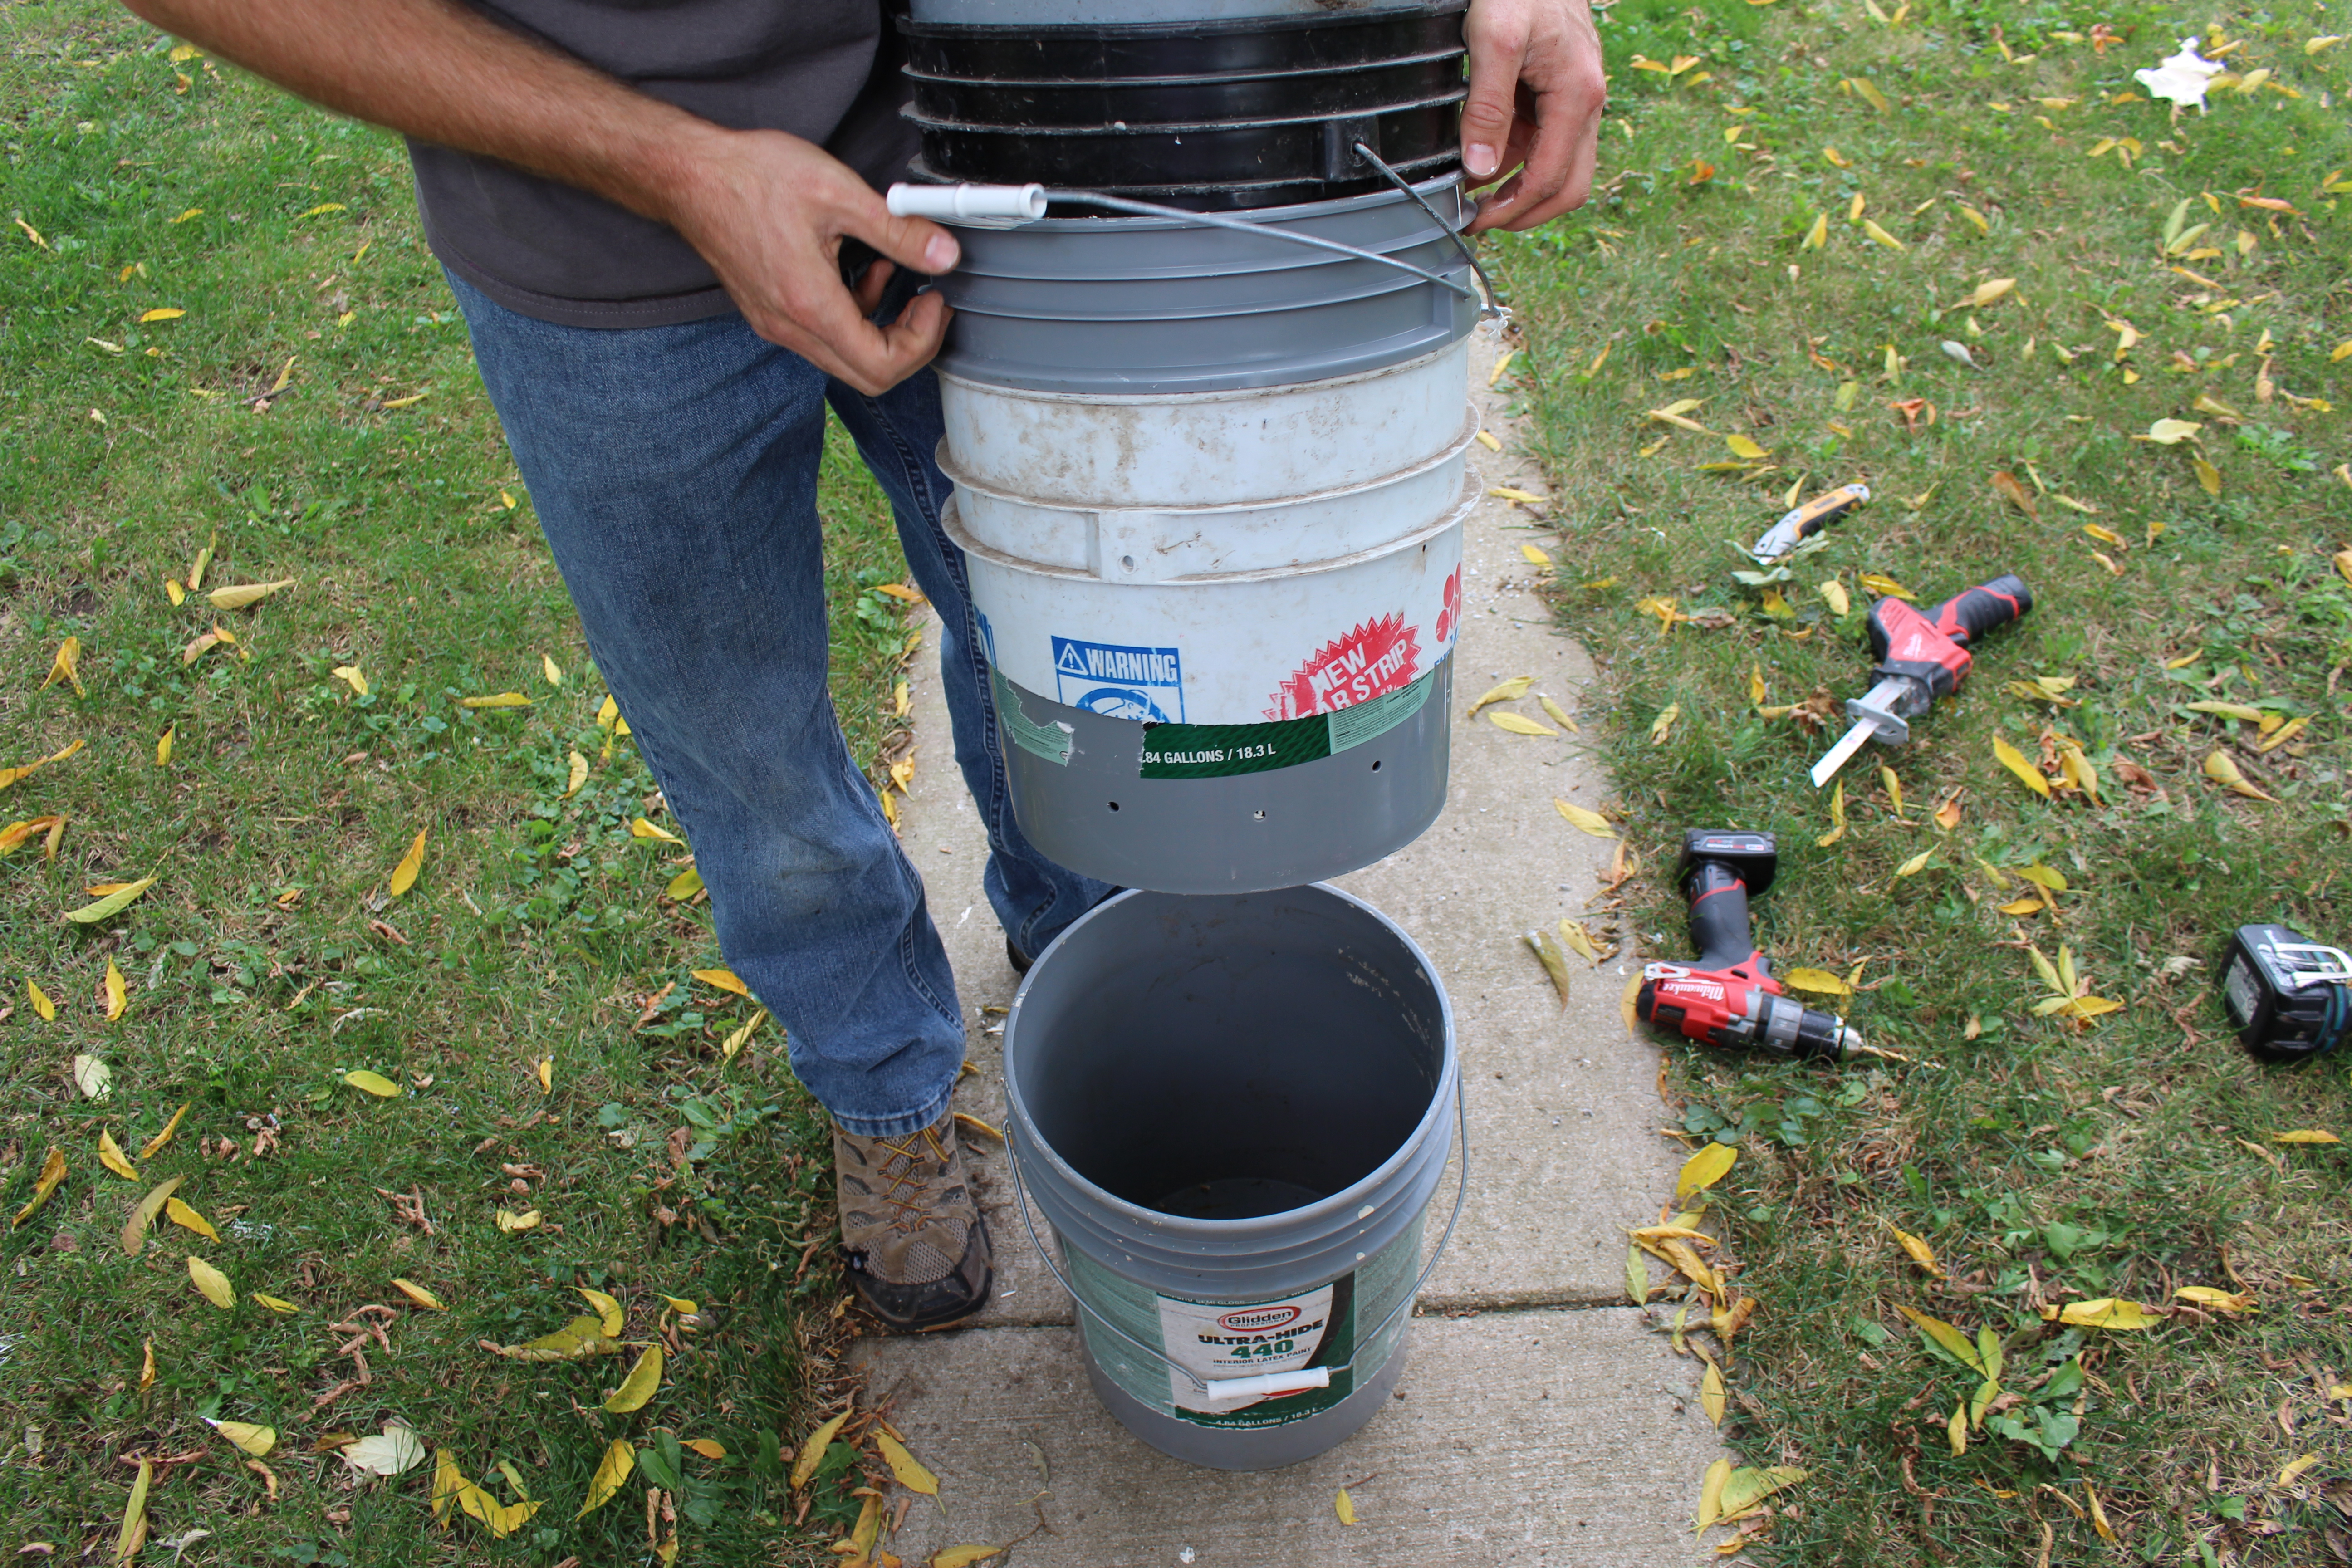
Step 7: Create a top for the buckets. Some buckets come with a lid, but we did not have one, so we used the bottom of one of the buckets we cut off. (So in the picture below, the bottom bucket has no holes, the white (2nd) is a spacer, the middle bucket has holes, the black (4th) is a spacer, and the top grey bucket has holes)
Step 8: Gather your worms and put them in their home 🙂 We went digging for earthworms in our own flowerbeds, but the best worm for this process is the “Red Wiggler” worm. We contacted a local urban gardening place (Growing Power) for these, but they ended up being difficult to work with, and could not ensure many worms. So we ended up ordering our Red Wigglers on Amazon 🙂


Then I enjoyed a new treat, Kombucha soda 🙂
How to use your 5 bucket worm compost: First put the worms and soil into the third bucket with the holes. Then start adding food scraps, and periodically cover the food scraps and worms with shredded paper. The worms like dark places, so they will stay as deep as possible, as long as there is food for them to eat. The shredded paper helps to cover them and helps mitigate any bad odor.
If there happens to any odor coming from your buckets, it simply means the worms are not keeping up with your decomposing food scraps. They will usually eat their body weight a day, and they can multiply to fit your needs. Therefore, be patient, while the food to worm production ratio balances out. 🙂
This whole process may seem a little tedious, and it may seem strange to have worms, in a stack of buckets, in your home. However, this is just another small way to participate in nature’s cycle and keep our earth and our land healthier. 🙂

I had 1 for years I suggest 2 buckets 1 with holes the second with rock to avoid worms drowning. Sit in a dishpan of water with a aquarium heater to warm in winter. Put them all in a large card board box for insulation in summer keep dishpan full to keep cool.
LikeLike